1 Girl's Point of View

Our opinions (whether you like them or not)

Is Seaweed the Next Big Superfood? – Healthy Living on Shine

By now, everyone knows about Superfoods. Here’s a surprise superfood that I never saw coming, but I’m glad is here. Now if only I can think of a way to use it in a cupcake…..

by SHAPE magazine, on Thu Oct 27, 2011

By Cynthia Sass, MPH, RD.

The other day as I walked through Whole Foods, I felt like I was in an aquarium. Everywhere I looked I saw seaweed! Seaweed snacks are the new coconut water, and varieties like wakame are popular in prepared dishes such as chilled seaweed salad.

It seems that sea veggies are a hot new superfood, with reported benefits ranging from heart protection to weight loss. Currently researchers are studying potentially protective compounds in eight species of seaweed from Ireland and Canada that may help reduce blood clots and hardening of the arteries , two major risk factors for heart disease. Another recent report published in the Journal of Agricultural and Food Chemistry reviewed almost 100 previous studies and concluded that some seaweed proteins work just like blood pressure meds. And in animal research a component in brown seaweed was shown to help rats burn more body fat.

Research aside, sea vegetables , including kelp, nori, hijiki, wakame and others are rich sources of iodine and one of the few sources of this important mineral— just a quarter of a cup packs a whopping 275 percent of the daily value. Too little iodine can trigger hypo or hyperthyroidism, fatigue, weight gain, and depression. And they’re also a good source of magnesium, which can improve sleep and alleviate hot flashes in women going through menopause.

To reap the benefits try out a dried seaweed snack, such as Annie Chun’s. The sesame variety is made from just seaweed, canola oil, sesame oil and salt (so no artificial extras), and 10 sheets contain just 30 calories and 70 mg of sodium. Plus they’re portable, and you can crumble them as a topping for a garden salad or stir fry.

Other fun ways to eat more seaweed include:

Make a wakame, cucumber side dish dressed with brown rice vinegar and fresh grated ginger

Whip up a seaweed pizza ‚brush extra-virgin olive oil or sesame oil on a whole grain flatbread crust and top with garlic, onions, fresh sliced tomato and nori

Start your day with seaweed – add julienned nori, sesame seeds , green onions, shredded carrots and sliced mushrooms to one whole organic egg and two whites or scrambled organic tofu

Make a side of seaweed salad a staple in every sushi order

via Is Seaweed the Next Big Superfood? – Healthy Living on Shine.

Pastry Bags: Disposable or Reusable?

Disposable plastic pastry bags

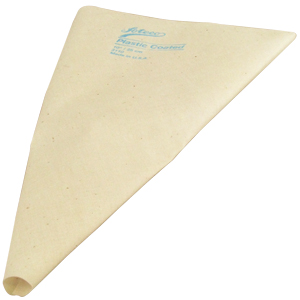
To be fair, there are really 2 kinds of disposable bags. Plastic bags and parchment cones. You can make parchment cones yourself out of parchment paper triangles. You can make them large or small and they can even be fitted with a pastry tip at the end and filled with small amounts of frosting (1 teaspoon to 1 tablespoon). Parchment cones are perfect for when you have intricate designs and don’t need a lot of frosting.

Popular disposable plastic piping bag brands include: KEE-SEAL,  Wilton, CIA, and Fat Daddio’s.

Pros:

  • They’re disposable -woot! A definite convenience.
  • The ones I purchased were transparent so it was easy to tell at a glance what color was in there when I tinted several colors of icing at a time.
  • Clean up is certainly easy.
  • They’re inexpensive if you don’t use them often.
  • You get a clean one each time. No leftover greasy residue from frosting not being washed off properly.

Cons:

  • In my opinion, the biggest flaw about disposable piping bags is their inherent lack of strength due to the plastic that’s used to make them. I can’t tell you how many times I’ve pushed my finger right through the flimsy plastic while squeezing out frosting. Other times, the frosting would sneak it’s way between the coupler and the bag. Granted, I should have used a softer frosting or a larger tip so I wasn’t squeezing so hard, but I was still learning that disposable bags were not my friend.  Putting my finger through the bags or frosting squishing out from all the wrong places caused frustrating time delays. I had to scoop out the frosting from the bag into yet another disposable bag. Wilton claims their disposable decorating bags can handle the pressure. However, the disposable bags I purchased from Michael’s were made by Wilton…. Sorry Charlie Wilton. To be fair, I found numerous positive reviews about their plastic decorating bags.
  • Disposable bags are not environmentally friendly.
  • They aren’t as easy to use because disposable plastic bags are not flexible and have a very stiff feel when filled.
  • Disposable bags tend to run on the small side (8″, 10″, & 12″ generally, although I have seen 16″) This means you constantly have to stop and reload it with frosting, which is annoying and wastes time.
  • Disposable are expensive in the long run (if you use a lot of bags) because they are thrown away and have to be purchased again and again.
  • They can slip out of your hands.

Reusable pastry bags

They come in featherweight (white) bags, silicone and also plastic coated fabric bags (cotton & canvas).

Popular brands of reusable piping bags include: Ateco, Wilton, Fat Daddio’s,

Pros:

  • Some people wash them in the dishwasher, but I haven’t personally had success with doing this. However, I do prefer to wash them by hand and using Dawn dish washing liquid really cuts through the grease.
  • They are more flexible. Especially the Ateco Plastic coated fabric ones.
  • You can probably get about 100 uses out of each featherweight bag.
  • The plastic coated fabric bags last a really, really long time.

Cons:

  • Unless you have lots of these, you”ll have to wash out the bag after each use with hot soapy water, or when you want to change colors.
  • They are more expensive than disposable bags.
  • White featherweight bags can stain. Especially when filling them with red or black tinted frosting.
  • The plastic coated fabric bags can be a bit bulky to work with.

Results:

Reusable Wins!

With experience I can handle all of the bags equally well and I keep them all on hand for different reasons.  I think everyone should try both the disposable and reusable bags to get the feel of each one and try them again as their level of experience increases. Once you know your way around each kind of bag, use what suits you best! When I started, I purchased disposable piping bags. They didn’t cost a lot and I didn’t want an expensive learning experience. Then, I moved on to the featherweight bags, which are usually made out of spun polyester. I bought about 10 Magic Line 12″ bags from a restaurant supply store in town. They have a great, soft feel in my hand. I’ve heard of people lining their featherweight bags with a smaller plastic disposable bag. Not only does the featherweight feel better against your hand, but doubling the bags cuts down on hand heat transferring to the frosting and potentially melting it. Plus, clean up’s a snap! Once I got the feel of the featherweight bags, I purchased an 18″ plastic coated canvas bag from Ateco. I was so pleased with this bag. It was a larger bag so it hold more frosting and I didn’t feel like I was forever refilling it. If I had to choose one bag as my favorite, it would be my reusable plastic coated bag by Ateco.


Frosting a Cupcake: Pipe or Swirl?

There are a lot of ways to frost a cupcake. I’m putting piping against swirling. Each method creates a unique look that looks great. Whether you’re using a rich buttercream or a silky meringue, try each frosting technique to see which you like best. I’m sure you’ll definitely have a preference within the first 15 minutes. Both piping and swirling take practice to get it right. Don’t get too discouraged. After all, it’s only frosting! If you don’t like the results, simply wipe it off and try again.

Pipe

Frosting Tips

Using a pastry bag with a wide star or round tip, pipe the icing onto the cupcake in a circular motion, starting from the outside and working your way toward the middle of the cupcake. I like to drizzle on hot fudge on top, use sprinkles, or small fondant flowers to create a finished look. A fun cupcake that uses piped on frosting is this Hi-Hat cupcake.

Swirl

This is also a good way to frost a lot of cupcakes. Perfecting the swirl on top is the key to making these tasty cakes look professional. This demonstration video from Cupcake Royale makes it look easy but trust me, it takes a little longer than 2 minutes to perfect!

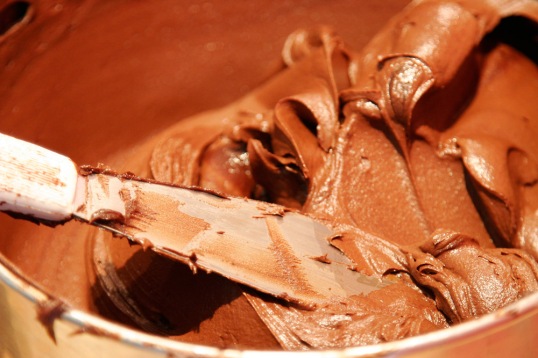
Both Magnolia Bakery in New York and Cupcake Royale in Washington use a flat cupcake spatula (large palette knife) to form their trademark swirl on top of their cupcakes.

Offset frosting spatula

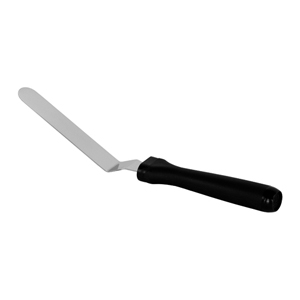
I prefer an offset spatula instead of the flat spatula. It makes frosting easier by providing exceptional control. Offset blade icing spatulas keep your finger away from the frosting, especially when working with large cakes. Dragging your knuckles through the frosting does not count as a “design”.

Results:

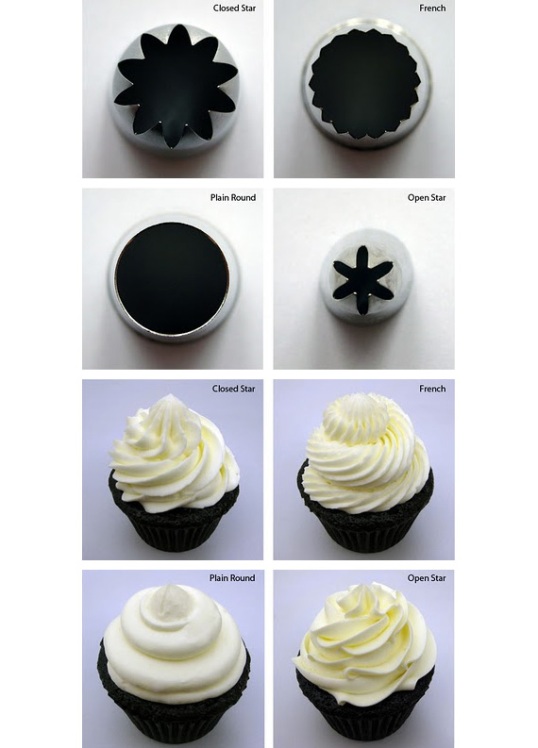
Piping! (by a mile) This is personally my favorite way to frost a cupcake. I have an 18″ (huge) pastry bag which holds a lot of frosting. Piping seems to be the fastest way for me to frost cupcakes and still achieve a beautiful look. Changing the tips (open star, closed star and round) is also a quick way to change the look of your piped frosting. If I’ve got a lot of cupcakes to frost, piping is my first choice. There are also many more piping techniques than swirling, which will make your cupcake look beautiful and unique.

Vanilla Buttercake Recipe

from Cupcake Royale

For those of you who don’t live near a Cupcake Royale location in Washington, or who prefer baking at home, here’s recipe for the shop’s new vanilla cupcake, scaled down for the home baker, which Cupcake Royale owner Jody Hall kindly shared. (recipe from eatallaboutit.com) A few of the brands listed might be tough for the home baker to find, unless you live in Washington, so go ahead and support your own local economy by substituting what’s available where you live. I’m a big fan of shop local, eat local, whenever possible.

makes 1 dozen

2 3/4 c. Shepherd’s Grain cake flour
2 3/4 c. sugar
1 tsp baking powder
1 tsp salt
1/2 c. local egg whites
1/2 c. warm water
1/3 c. Medosweet sour cream
5 ounces Medosweet butter
3 tbs expeller-pressed canola oil
1 tsp Gahara vanilla bean paste

Line a cupcake tin with your favorite cupcake wrappers, and set your oven to bake at 350 degrees. Combine dry ingredients in a mixer and mix on low speed. In a separate bowl, combine water and sour cream. Add vanilla paste and egg whites to this mixture and stir until combined. Add the butter, oil, and 1/4 of liquid mixture to your dry ingredients, and mix on low speed until moistened. Increase to medium speed and mix for one minute. Scrape down the sides of the bowl and gradually add the remainder of the liquid mixture in three doses, beating for 20 seconds after each dose.  Scoop batter into wrappers. Bake at 350 degrees for 20 minutes, or until edges are slightly golden. Set cupcakes aside until they are cool to the touch, then frost ‘em up with real buttercream.

A fond farewell to summer

Today I found myself wanting to hang on the last bit of summer, even though it’s technically fall.  It’s been a gorgeous sunny day and 74 degrees outside. I dabbed on a little Hawaiian Tropic Golden Tanning Oil behind my ears just to get a perfect summery scent that’s really keeping me in a great mood. This is a very inexpensive way to keep summer around just a little longer.

We’ve had such a fantastic summer this year. Our family became new boat owners when the summer started  and we’ve thoroughly enjoyed boating, BBQing and fishing on the lake all summer long. I went on the tube for the first time this year and continued to yell, scream, laugh and get thrown off every time we went. The kids thought this was very amusing, as well as helping me zip up the “obviously mislabeled” size large life jacket. It’s a good thing I’m a good sport 😉

Since the lake is probably too cold to go boating and swimming, I still wanted to enjoy the feeling of summer somehow. I convinced my hubby to put a brisket in the smoker. He bought a beautiful 5lb. all natural brisket from S&S Produce and all the fixins for his famous Sweet and Smoky Baked Beans. These beans are so good you can eat them for breakfast….cold….(with a glass of milk, of course!)

Sweet and Smoky Baked Beans

(recipe adapted from (Food Network) Steven Raichlen, author of The Barbecue Bible and Barbecue Bible Sauces, Rubs, and Marinades (Workman Publishing)

Ingredients

  • 4 strips thick sliced bacon, cut into 1/4-inch slivers
  • 2 medium onions, finely chopped (about 2 cups)
  • 1/2 green bell pepper, finely chopped
  • 2 gloves garlic, minced
  • 2 (15-ounce) cans  kidney beans, drained and rinsed in a colander
  • 2 (15-ounce) cans  pinto beans, drained and rinsed in a colander
  • 1/3 cup molasses
  • 1/4 cup barbecue sauce
  • 1/4 cup ketchup
  • 4 tablespoons dark brown sugar, or to taste
  • 1 tablespoon Worcestershire sauce
  • 1 tablespoon prepared yellow mustard
  • 1 tablespoon dry mustard
  • 1 tablespoon apple cider vinegar
  • 1/4 tablespoon liquid smoke, or to taste
  • Salt and freshly ground black pepper

Directions

In a heavy pot, cook the bacon over medium heat to render the fat, about 5 minutes. Discard all but 2 tablespoons fat.

Add the onion, pepper, and garlic and cook until the vegetables are soft, about 5 minutes. Stir in the beans,molasses, barbecue sauce, ketchup, sugar, Worcestershire sauce, mustards, vinegar, and liquid smoke. Simmer the beans, uncovered, until rich and thickly flavored, 10 to 15 minutes, stirring with a wooden spoon. Alternatively, place the baked beans in a deep baking dish and bake in a 350 degree oven for about 30 minutes. Add salt, pepper, or any other ingredient to taste.

The brisket is on the smoker as we speak and smells DEEEELICIOUS! He’s smoking it for 6 hours and I’m sure our neighborhood is already drooling by now. He’s using his original recipe for flavor injection, which will make it extra juicy and flavorful.

Better than Smokin’ Mo’s Flavor Injection

¼ cup olive oil

1 tablespoon salt

1 tablespoon dry mustard

2 tablespoons Worcestershire sauce

3 tablespoons apple cider vinegar

  1 tablespoon molasses

Mix all ingredients together in a small bowl. Fill flavor injector, inject into meat and repeat until all the mixture has been used.  This yields enough for a 5lb brisket. – enjoy!

I bought a seedless watermelon on Tuesday and thought this would be the perfect day to have it. I decided to make a fresh Watermelon Punch. In each glass, I muddled some fresh mint we have growing in the garden and garnished with a sprig on top. This refreshing summery drink was quick and easy to make.

Watermelon Punch

1 small seedless watermelon (it helps if it’s very cold)

Juice of 1 lemon

Juice of 1 orange

1/4 cup simple syrup  (more or less to taste)

Mint for garnish

Lemon slices for garnish

Cut rind off entire watermelon and discard. Cut watermelon into medium size chunks. Working in batches, fill blender with watermelon chunks and puree. Turning the blender off periodically, use a wooden spoon to help incorporate the watermelon so it will blend well.  Pour watermelon juice into a large pitcher. Add the lemon and orange juice. Add simple syrup to taste. Stir well. Pour over ice, garnish with mint sprig and lemon slice.

It smells as good inside with the sweet and smoky baked beans in the oven, as it does outside with the brisket slowly smoking. Not to mention the smell of the pina colada with the suntan oil I put on. Even though I’m saying goodbye to summer, we are definitely going out with a bang!


Chopped S10

Ok, those of you who have seen this picture will understand what I’m about to say. Or perhaps you just “get it” immediately. This is from Street Source. It’s under the Mini Trucking/Rat Rod forum. First of all, Mini Trucks and Rat Rods? This seems disturbing to me in many ways. Alas, I offer proof. This is a hideous combination and I am not okay with it. Aside from the fact that it’s an s10 rat rod, the chop is way too extreme. The back window looks like a mail slot now. I don’t even think an adult human being could even fit inside the cab (and sit up at the same time)

p.s. nice tire and wheel combo.

Chopped S10

Bling it on!

I’m tired of looking at the visual effects of a male-dominated world. Sure, I could go into war, politics, religion, etc, but I’m going to keep it simple: I like my world to LOOK PRETTY! Have no idea what I’m talking about? Take tools for example: they’re all metal; no colors or patterns and not pretty to look at. Why? Because guys make them and guys don’t care what they look like. They use them for function, not for looks. (this last observation was made by my husband after reading this post. Quite frankly, I’m surprised this all he had to say about it) If I’m going to use a tool, I want it to work AND look pretty – and it can! There’s no reason to surround yourself with the color of metal or feeling of drabness. And it’s not just metal. When I walk into an auto parts store, or a tool store (or other mechanical man-type stores) I’m just not inspired. Everything looks so cold and uninviting. Retailers could at least offer more stylish choices for the fashion conscience consumer. Women can build hot rods and fix things when they break (just to name a few) and we should have tools and accessories designed to be both functional and representational of our femininity.

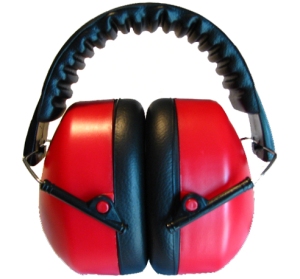
Here’s a perfect example of a recent purchase of ear muffs from a local tool store. Generic, bland, boring. I was determined to take action to turn them into something I can feel good about wearing. 

Boring

I popped off both ear cups with a flathead screwdriver. Then I scuffed up the red plastic surface with 120 grit sand paper. I used masking tape to mask off the s quishy part that touches your face and ears. Then I mixed a ratio of 2/3 red glitter to 1/3 gold glitter in a shallow bowl. Once both of the cups were prepared, I used Mod Podge clear acrylic sealer spray (I was out of spray adhesive) to spray on a thin coat all over the red plastic part of cup. I sprinkled the glitter mix all over the cup. I sprayed on more clear sealer, and then more glitter. I did this a total of 3 times until the cup was evenly coated. Then I repeated the same spray/glitter sequence to the other prepared ear muff. I let the glittered ear muffs dry overnight. In the morning, I shook and dusted off all the extra glitter from each cup. Then I popped the cups back onto the fittings of the headband part of the ear muffs with pliers, being careful to press gently so as not to crack or break and plastic parts. Since glitter was involved, it got rather messy so make sure you lay down plenty of newspaper before you begin. This was a fun project and proof that there are other choices out there. Make your stuff your own!

Blinging!

Post Navigation